


Everyday Plumbing Tips
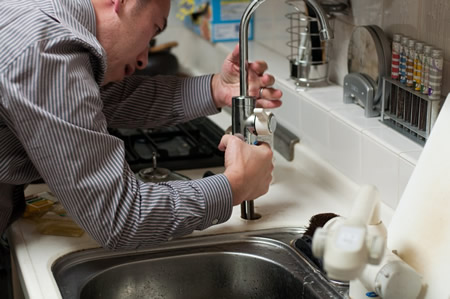
As much as the team at All Star Plumbing and Restoration loves helping Boise area residents with plumbing mishaps, they also believe in being proactive. These 3 everyday plumbing tips can prevent issues and the need to call a plumber:
1. Know the Plumbing
Homeowners should be familiar with the type of pipes they have, how old they are, and where important plumbing components are located. Knowing the type and age of plumbing gives homeowners an idea of when their pipes might need replacing, so they can keep an eye out for aging problems like leaks. Knowing where the main water valve, along with other valves for toilets, sinks, etc. can minimize water damage in the event of a burst pipe.
2. Clogged Drains
Preventing the drain from getting clogged in the first place is a homeowner’s best bet. Invest in a bathroom drain hair stopper for the shower or bathtub. They’re inexpensive and prevent hair from causing clogs in the pipes. When dealing with clogs, avoid using chemical cleaners. They can be harmful to the pipes and make issues worse. Use a plunger or snake instead.
3. Don’t Flush
There are a lot of things people tend to flush down the toilet that aren’t meant to be flushed. The biggest troublemaker is feminine products. Keep a trashcan near the toilet for these products, as they are a huge source of toilet clogs. People also tend to flush dead fish down the toilet. However, if the house is hooked up to a septic system, this is not a good idea. It could end up contaminating the system.
These three tips can help residents avoid quite a few plumbing mishaps, saving them money and giving them peace of mind. Of course, All Star Plumbing and Restoration is just a call away if a plumbing problem does arise.
Importance of Winterizing Hoses and Outdoor Faucets
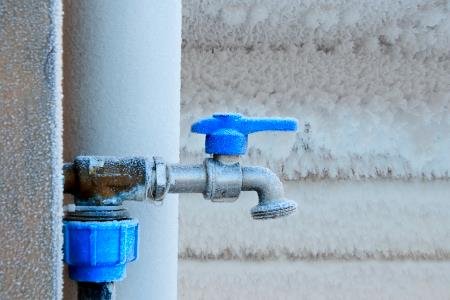
As the weather gets colder, Boise and the Treasure Valley are getting closer to the first frost of the season. Before that happens, residents must winterize their garden hoses and outdoor faucets to prevent freezing and leaky water pipes. Here’s how to go about it:
Garden Hoses
Disconnect the hose from the outdoor faucet and thoroughly drain the water from it. Then, hang it on a support, or coil it loosely in a storage shed or garage. Avoid hanging it with nails. This prevents kinks and other possible damage. If the hose is left connected to the outdoor faucet, it will trap water and cause the faucet to freeze. Even one night of freezing weather with a garden hose still attached can mean trouble.
Hose Bibs
Hose bibs, or outdoor faucets, take a little more work to winterize than hoses. After the hose is disconnected and properly stored away for the winter, the next step is to inspect the hose bib. Look for any leaks that could be present and repair them right away or call All Star Plumbing and Restoration.
Once it is leak-free, get as much water out of the faucet as possible. Shut off the water supply and let it drain. If the hose bib is of the frost-free variety, like those that All Star Plumbing and Restoration offers, this step isn’t necessary.
Lastly, insulate the hose bib with a cover. They fit perfectly over the faucet, keeping the cold weather away to prevent freezing. Even frost-free hose bibs can benefit from the extra insulation. These covers are inexpensive and easy to install.
For any hose bib issues or questions, contact the team at All Star Plumbing and Restoration. Be proactive in winterizing the plumbing to prevent water damage from a burst pipe.
Repair or Replace the Tub
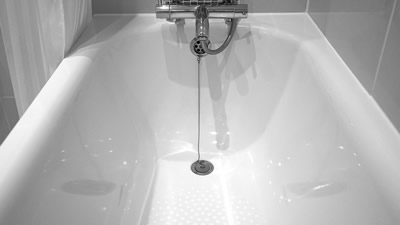 When the bathtub starts showing signs of damage like cracks and chips, homeowners must decide whether to repair or replace it. If these cracks and chips are left unfixed, it could lead to costly leaks later. Deciding whether to repair or replace depends largely on cost and the extent of the damage.
Repairing
A repaired and refinished bathtub can last for decades longer when treated properly. To fill cracks and chips, All Star Plumbing and Restoration uses a waterproof resin. That resin is then sanded and filled with a strong coating. After that, we brush and even out the coating and blend it with the rest of the bathtub. Repairing damages to the tub is often less expensive than buying a whole new bathtub and can last just as long.
Repairing the tub with the help of All Star Plumbing and Restoration is a good solution if the damage is minimal and the tub isn’t stained. If there’s extensive damage, or it is permanently stained, repairing it might be a lost cause.
Replacing
Replacing a bathtub can have hidden costs. Buying the bathtub is just the first expense. There’s also removing it, adjusting the plumbing, and fixing any damage to the flooring. The bathroom is often built around the bathtub, so removing the flooring around it might be necessary, as well as adjusting the plumbing for a new style of tub, which All Star Plumbing and Restoration can do.
If the bathtub has a large amount of stains, cracks, or chips that will be too much to repair, or has already started to leak, replacing it is the best bet though. If water damage is discovered once the bathtub is removed, All Star Plumbing and Restoration can handle the water damage from the leaks before installing the new tub.
Toilet Paper Roll Pumpkin
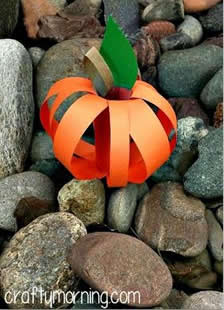 Get in the fall mood by recycling those toilet paper rolls into a cute little pumpkin decoration! They can be hung up, used as a centerpiece, and more. Here’s what you’ll need:
- Empty toilet paper roll
- Orange and green construction paper
- Scotch tape
- Scissors
Directions:
- Cut a little part off the toilet paper roll. This small piece will be the stem.
- Cut the orange paper to the size of the rest of the toilet paper roll and glue it on.
- Cut one-inch thick strips of the orange paper. Then tape each end of the strips to the inside of the toilet paper roll on the top and bottom so it bows out away from it.
- Keep going around the pumpkin this way until no more pieces will fit.
- Take the small piece of toilet paper roll that was cut earlier, flatten it a bit, and tape it to the inside of the top of the roll.
- Cut out a leaf from the green paper and tape it next to the stem.
- Hang it up or place it on a table.
For more in depth directions and pictures, click here.
Past Plumbing Newsletters