


Avoid Holiday Plumbing Disasters
 Thanksgiving might be over, but there are many more holiday gettogethers before the year is over. This time of the year can do a lot of damage to a home’s plumbing system between possible freezing and the extra pressure from cooking and guests. To avoid any mishaps this holiday season, follow these tips:
1. Toilet
The toilet could experience extra usage during the holidays, causing some wear and tear. The most common issue with extra usage is a worn-out flapper valve. This can cause the toilet to constantly refill, increasing the water bill. Check the flapper valve to make sure it is in good condition before guests arrive. If it isn’t, replacing it is a good idea.
Another issue the toilet can face is a serious clog. Clogs can be annoying, especially when a plunger can’t get rid of them. For serious clogs this holiday season, call All Star Plumbing and Restoration. We have even been called in the middle of a party to come through the back door and solve a plumbing issue without guests being interrupted!
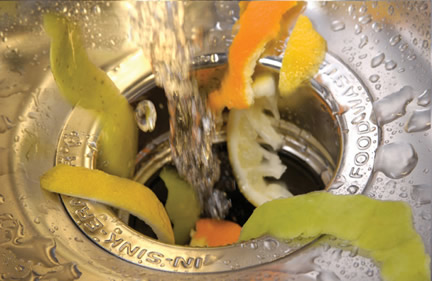
2. Garbage Disposal
While cooking for guests, be sure to avoid overfilling the garbage disposal or putting the wrong food scraps down it. The garbage disposal can only handle so much food at once, and should always run with cold water. Remember what can and cannot go down the disposal to avoid blockages from grease and certain foods.
3. Water Heater
With more people in the home, the water heater could become overwhelmed this holiday season. To accommodate the extra usage, consider turning the temperature up to increase its capacity. Just remember to never turn it up past 120 degrees Fahrenheit. Anything higher can actually burn people.
These are the most common issues plumbers run into during service calls over the holidays. Keeping these tips in mind can help homeowners avoid having to call a plumber this season. However, if any issues do arise, remember the team at All Star Plumbing and Restoration is just a phone call away.
Fixing Leaky Garbage Disposals
The most common garbage disposal issue is a blockage, but they can be susceptible to other issues as well. Once of those issues is leaking. The garbage disposal can leak from a few areas, each signaling a different problem.
Although garbage disposal issues should be left to the professionals, homeowners can benefit from knowing what the issue could be. Here are three leaky garbage disposal scenarios and what they mean:
1. Bottom Leak
If the leak seems to be coming out of the bottom of the garbage disposal, the internal seals could have worn out. This happens over time and usually signals the need for a new garbage disposal. Fixing the seals is possible, but could be a costly and aggravating fix if it is no longer under warranty.
2. Side Leak
A leak coming out the side of the garbage disposal usually means the drain lines are having issues. The connections generally just need tightened or resealed. This can be done with a screwdriver and a rubber gasket replacement.
3. Top Leak
A garbage disposal that is leaking from the top could mean there’s a problem with the sink flange or plumber’s putty. This seal might have corroded or loosened, allowing for water to seep through. The garbage disposal will need to be resealed to fix the issue. It’s best to have a plumber do this to avoid possible water damage from a mistake.
A leaky garbage disposal can waste water and cause water damage, depending on how long it has been leaking. All Star Plumbing and Restoration can fix the leak and correct the water damage under the sink. Call as soon as the leak is noticed to prevent further water damage and an increased water bill.
Water Damaged Walls
 Water damage can happen in many areas of the house, including inside of the walls. When it is inside the walls, it can be hard to notice until the damage reaches the outside. This can lead to costly dry-out and repair.
When walls become water damaged they might show these signs:
- Mold and mildew
- Blistering paint or wallpaper
- Warping or staining
Any of these are a good indication there is a plumbing leak in the wall that needs to be fixed. Call All Star Plumbing and Restoration right away when these signs pop up. Here are the steps of dealing with water damaged walls:
1. Find the Leak
Before making repairs, the water leak first needs to be repaired. All Star Plumbing and Restoration is experienced in finding hidden water leaks within walls and ceilings. They will be able to easily find the source of the leak and recommend a plan of action.
2. Remove Damage
Some walls might be too water damaged to fix. They might be too compromised and need to be removed. The damaged areas will need to be cut away before the dry-out process.
3. Dry Out
The spots that are not too damaged might be able to be dried out and salvaged. All Star Plumbing and Restoration has specialized tools and equipment for drying out water damaged areas. They can find hidden moisture as well. This ensures an effective dry out.
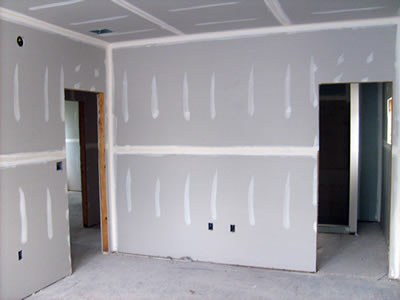
4. Repairing and Installing
Once those steps have been completed, All Star Plumbing and Restoration can begin repairing the drywall. There are three steps to installing drywall, which are hanging, taping, and texturing. This will help the repaired area blend in nicely with the rest of the wall.
5. Paint
Once All Star Plumbing and Restoration has finished fixing the leak and repairing the damages, it’s time to paint! Painting is the last step of the process to make the wall look as good as it did before. Homeowners could also take this time to do a little redecorating and paint the room a new color.
When a plumbing leak inside of the wall is suspected, call All Star Plumbing and Restoration right away to make the necessary repairs.
Which Way Should Toilet Paper Hang?
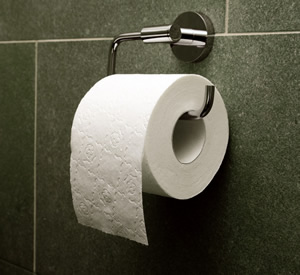
There have been many arguments over the years about which way toilet paper should hang on the dispenser. Everyone has a strong opinion, but science may have just ended the debate with a new study.
According to a study conducted at the University of Colorado, the correct way to hang toilet paper is over, not under. By hanging it with the end going over the top, the person using the toilet paper only touches what they’re personally using.
Why is this important? Because it helps to cut down on germs and bacteria. When the toilet paper is placed going under, the person’s hand could touch the wall, leaving or picking up unwanted bacteria. Bathrooms have enough bacteria, so anything that helps prevent its spread is a great idea.
Another interesting argument for the over style can be made with hotels in mind. Hotels replace toilet paper more than most people, so it makes sense to follow what they do. However, they might just place it this way so they can create the fancy fold at the end of it.
Those who have toddlers and cats prefer the under method to prevent it from being completely unrolled. This way makes it harder for toddlers and cats to unravel, saving pet owners and parents some sanity.
Science may be able to sway some who prefer under to the over side with this debate, but this argument probably won’t ever be fully solved. Personal preference, along with the presence of toddlers and cats will likely always have the last say.
Past Plumbing Newsletters