


Common Plumbing Problems in Older Homes
It can be tricky when looking to buy a home built in the 1980’s or earlier because many times the houses have been updated and appear to be in great shape, but below the surface the “bones” of the home may still be original and those bones could be about to break. When it comes to plumbing in older homes there are a few factors to consider.
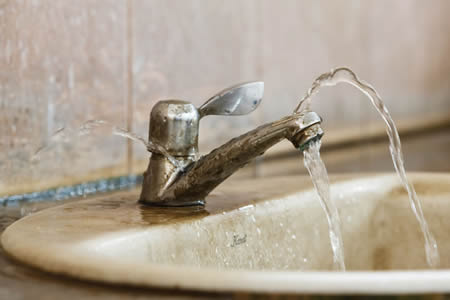
Galvanized Pipes – these pipes were pretty standard in homes built in the 1980’s and before. A galvanized pipe refers to a steel pipe that has been coated with a layer of zinc. Unfortunately, over time the zinc erodes and causes the pipe to deteriorate from the inside out. This can cause a whole array of problems from clogged toilets and faucets to low water pressure throughout the home. As the pipes corrode they will become filled with sediment which will reduce the water flow throughout. In a home with galvanized pipes you could easily find yourself having to repair faucets and toilets over and over again.
Polybutylene Pipes – this type of piping was very common in the late 1970’s to the 1990’s but is no longer sold as it does not meet building codes. It was found to react with the oxidants in public water which would cause it to flake and become brittle. This will result in a sudden pipe failure and subsequent water damage to the home.
Lifespan of Pipes and Fixtures – even with the best material type available there is still a lifespan for the pipes and fittings in the home. For example, copper pipes will last 60-80 years, galvanized steel 40-50 years and PVC 40-50 years. Plumbing fixtures such as faucets need replaced every 15-25 years, sinks/tubs/toilets every 40-80 years and shut-off valves every 20 years. These are all expenses to keep in mind when looking at an older home.
Faulty Home Repairs – generally speaking, if a licensed plumber has done the work on a home it’s unlikely that there will be any issues related to repairs. However, a DIY job does not come with the same guarantee. The most common mistakes to look for are unsafe water heaters, unvented drains, poorly secured pipes or traps installed backwards. Certainly many homeowners have done excellent work on their repairs but that’s not always the case and is something to take a look at before buying a home.
Buying an older home can be a great way to get into that first home, get a larger home at a lower price, or not have to finance your home purchase but it’s important to look deeper than just the aesthetics of the home. Often a home inspection is the best way to do that, a good home inspector will check the condition of the plumbing. If a problem is found after the fact or if you’re looking to upgrade or inspect your older home’s plumbing give All Star Plumbing a call.
Dealing with the Toilet Seat Problem
It’s an age-old problem that men and women have fought about for generations – men leaving the toilet seat up! Every woman has had that gross feeling of sitting on the bare toilet, and every man has had the uncomfortable feeling of getting reprimanded by a woman.
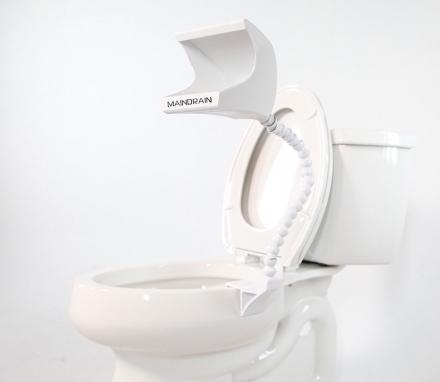
Recently a product was listed on Kickstarter, a crowd funding site, that is both amusing and interesting. This product is called The Main Drain and it’s claiming to be the solution to this struggle. It’s described as being, “an adjustable, lightweight urinal that attaches directly to the bowl of your toilet. It solves all your problems about the traditional toilet set-up, but without having the need to install a wall mounted urinal.”
It’s a clever idea but does it just create a new problem while solving an existing one? It clips on to the side of the toilet and includes a motion-activated LED light to help with aiming in the middle of the night. Not sure if it will catch on but at this point over 80 people have signed up as financial backers. It could be that they just want to be one of the first to own this product or that they really think it will make it big, time will tell.
While most women want the toilet seat down you have to wonder if they want that enough to have a urinal on display in their bathroom. Who knows maybe in a few years there will be a Main Drain attached to every toilet in America!
How Does the Sewer System Work
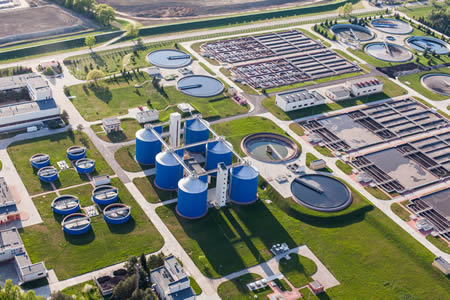
Have you ever wondered where all that waste goes after it leaves your house? What do they really do with it at a waste water treatment facility? While most people don’t like to spend much time thinking about things like this, it is an interesting question to ponder. When you consider all of the sewage generated at households and then double that to cover industrial and commercial waste, you end up with a whole lot of waste. So getting rid of it is no simple task. Sewage will travel through 3 different sets of pipes – those in your home, the local sewer, and ultimately to the waste treatment facility. Along the way these pipes can range from 8” in diameter all the way up to 11 feet in diameter.
The first step of the process is to screen out any large objects that may have gotten in such as logs, bricks, etc. After that is taken care of a settling tank, called a grit chamber, is used to hold the water while mud and sand settle to the bottom. This grit is eventually collected and disposed of at a landfill in an environmentally safe way.
The next part of the processing is called the primary treatment for the waste water. In this phase sewage goes in to the larger settling tanks and as much as 60% of the solids remaining in the waste water will settle out here. This will result in a sludge and water mixture. In this part of the process very few of the toxic chemicals are removed from the water, hence a secondary treatment is necessary.
During the secondary treatment plant oxygen is added to the wastewater. This will help to speed up the growth of micro-organisms. These organisms will consume the waste and then settle to the bottom of the tanks. After going through this process 80-90% of human waste and other solids have been removed. During this secondary treatment phase the majority of toxic chemicals are also removed.
Finally, sludge is processed in a sludge digester which heats it to kill any disease-causing bacteria. After this it goes through a pelletizing plant which removes any remaining water, dries the sludge and converts it into pellet fertilizer for use in agriculture and land reclamation projects.
After traveling through all of the settling tanks the wastewater is disinfected and discharged to local receiving waters, which are closely monitored to prevent negative environmental impact. When you see all of the steps involved in waste water disposal it definitely makes you think twice about leaving that sink running when you brush your teeth!
Restoration after Minor Water Damage to Your Business
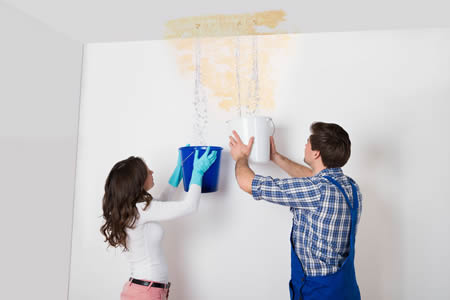
Many business owners have had to deal with some type of flooding, be it from storm damage and flooding or leaking/burst pipes. The temptation to handle it yourself can be high, but there are some risks to be aware of before trying to tackle the job. Even when dealing with a relatively minor, clean water restoration job it’s still important to go through the correct steps for the clean-up.
Before starting any type of clean-up it’s absolutely critical to know what you’re getting into. Be completely sure that this is not a gray or black water situation as this could present major health concerns for yourself, your employees and your customers and should be handled by a professional restoration team. If you’ve fully established that this is a clean water clean-up, then it’s safe to move into the next phase of the clean-up.
The next item of consideration is the scope of the problem. In many cases the problem areas you see are a small fraction of the problems that exist. In most situations a significant amount of the moisture is hidden in the walls and if not identified and handled properly can result in much more expensive repairs down the road if mold is found. A moisture meter can be used to help identify the extent of the damage.
Depending on the wall coverings, the process for drying out the walls may vary. If the walls are simply drywall with paint on them typically an air mover, which blows warm dry air will get the job done. If the walls are covered in wall paper it’s recommended to drill holes into the wall to get air into the wall cavities. This will increase the rate of evaporation. In either scenario the key is to get the walls dried out as quickly as possible. Opening doors and windows, as well as running fans and a dehumidifier, are always recommended. In many situations removing baseboard and molding in the affected area will help as well.
Although it may be difficult to hold back, be sure not to rush into the restoration process. The walls must be completely dry before starting the restoration. Again using the moisture meter can help determine if the walls are ready to move forward with. If there’s any uncertainty, it’s strongly encouraged to have a professional restoration expert consult on the job, certainly the health and safety of your employees is the top priority.
Past Plumbing Newsletters