


How to Descale a Tankless Hot Water Heater
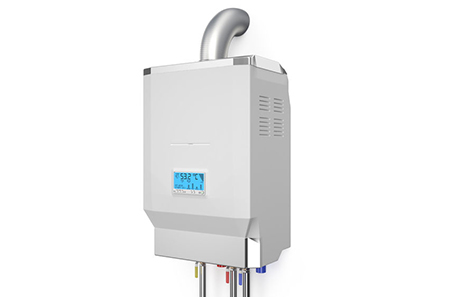
Over time your water heater system will build up the dissolved solids that are left behind when water is heated. This build up will reduce the efficiency of your system, and could cause your water heater to overheat, which will lead to an expensive repair. To avoid an unexpected visit from your plumber be sure to descale your system at least every 2 years.
In order to complete this you’ll need a few supplies – a system descaler with a pump, bucket and hoses, and a cleaning solution known as descaling solution. Before getting started check your water heater to make sure you have the proper valves connected, if you don’t have these valves All Star Plumbing and Restoration can help just give us a call.
To get started, turn the valves off and remove the hose threads from the second hot and cold water ports. Then attach the system descaler to the hot valve. Use the hose that came with the descaler and place one end in a bucket and connect the other end to the valve. Run the other hose from the descaler pump to the cold valve and turn the cold water on. Place the pump in the bucket and fill the bucket with enough hot water to submerge the pump.
Now add the cleaning solution to the bucket and turn on the secondary tap. Feel free to turn off the gas at this point to avoid wasting hot water during the cleaning process. Plug in the pump and fire it up. You should let it run for at least an hour to circulate the solution through the system. Once this is completed turn off the pump, turn the inlet and outlet valves off and disconnect the hoses. Turn the hot water valve back on and allow the remaining water to drain out into a bucket.
Check the bottom of your tankless water heater for a small screen. Unscrew this screen, pull it out and visually inspect it for cleanliness. If necessary, rinse the screen to remove any remaining debris and replace. Now reattach the hoses, leave the hot valve turned off, and turn the cold water back on. Go ahead and turn the gas back on and allow clean water to run through the system to flush out any remaining cleaning solution. Finally turn the isolation valve back on, double check that both hose ports are in the off position and both isolation valves are in the on position. At this point the descaling process is complete and you should be good to go for a few more years.
Dealing with a Clogged Washing Machine Drain
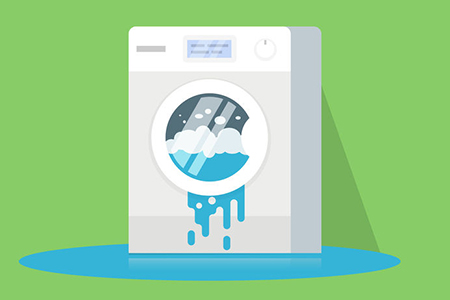
Many people have had the experience of opening the washing machine to discover that it’s still full of water. For some unknown reason water is no longer draining and is instead backing up inside the machine. In short order this clog will leave you with a funky smell, which isn’t coming from your pile of dirty laundry. So what should you do if you decide to tackle this problem yourself?
The good news is that in many cases your drain clog has been caused by something simple. Usually it’s soap residue build-up, materials from the clothes such as grease or oil, or fragments of things (such as pocket lint) that have built up. This means that once you access it, dealing with it doesn’t have to be that difficult either. Start by locating the drainage pipe, which is normally on the back of your washing machine. Place a bucket underneath and detach the pipe from the washing machine, then separate it from the drain hose on the other end.
Once you’ve removed the pipe it’s time to clean it out. Use an industrial grade snake for this. Insert it in the pipe until you meet resistance. When you can go no further begin turning the snake and applying pressure until you break apart whatever has built up in there and you no longer feel resistance. Slowly pull the snake out and you’ll find that it brings with it much of the debris that you’ve just dislodged.
If this sounds like more than you’re up for consider flushing your drainage system with a mixture of vinegar, baking soda and hot water. This can help break down those material build-ups and return your drain to normal functioning. We would not recommend the use of chemical products as they can be hard on your plumbing and end up causing more damage in the long run.
If you’ve tried both of these and your drain problem persists than it’s probably time to call in the professionals. Give All Star Plumbing and Restoration a shout and we’ll come take a look. It may be that the clog is actually underground or in the wall well beyond your actual washing machine. In these cases your stubborn clog is going to require professional tools to remove it.
Will Homeowner’s Insurance Cover It?

If you’ve ever had the experience of dealing with a broken sewer pipe you know that the damage can be extensive and the cost high. At All Star Plumbing and Restoration we get asked all the time whether homeowner’s insurance will cover broken sewer pipes, burst water lines and other expensive repairs. Unfortunately there’s no cut and dry answer to that question. There a number of factors that will affect who is going to get stuck picking up the tab in these situations.
The factor will be who your insurance company is. While your mortgage company requires that you have homeowner’s insurance this is typically limited to basic coverage. This type of coverage is likely to have exclusions. So if an event such as an earthquake caused your pipes to break, that isn’t likely to be covered. Generally weather events or “acts of God” are not covered. However in some of the lowest coverage options you’ll find that regular wear and tear is not covered either.
For mid-level insurance policies and above there are often additional coverage options for sewer and drain backup, flooding, and many of the most likely situations. These coverage add-ons are something you should be sure to ask your insurance agent about when shopping policies. Of course your deductible amount will also affect coverage. If you have a high deductible you may find your insurance only ends up paying a very small amount of the total cost of the repairs.
In most cases your insurance will not cover the repairs if they are caused due to a lack of maintenance, so getting a periodic visit and inspection from your plumber is a good idea. They will however cover damage if caused by an accident, an act of vandalism, or faulty workmanship. The best option is always to prevent a problem before it occurs. Address slow drains, identify the source of musty odors, and watch for unusual changes in the appearance of your lawn. Any of these can be a sign that a bigger problem is on the horizon. Getting these taken care of will also provide you with the necessary documentation to make your case to the homeowner’s insurance that maintenance has been done and the accident is not a result of regular wear and tear.
If you find yourself dealing with one of these unfortunate situations give All Star Plumbing and Restoration a call. We’ll help you sort out your insurance coverage, determine the cost of the repairs, and get the work taken care of right away.
Best Applesauce Ever

Tis the season for homemade applesauce, and there’s nothing better. Not only does it taste amazing and freeze well, it also makes your whole house smell fantastic. This recipe is the absolute best for making thick, delicious applesauce.
Ingredients:
20 apples (we like to use more than one kind at the same time to get the best flavor)
1 ¼ c. sugar
2 ½ tsp cinnamon
3 cups water
Directions:
Peel, core and slice your apples into relatively small pieces. (Just don’t put those peels in the garbage disposal or you’ll be calling All Star Plumbing) Typically cutting the slices into quarters will give you the right size. Jonagold and Yellow Delicious apples go really well together. Place apples in a large pot and add all of the other ingredients. Cover and set over medium heat until water begins to boil then turn heat to low. Let apples simmer on the stove for at least an hour. Stir about every 15 minutes during this process. Remove the lid and let the sauce continue to cook for an additional 15-30 minutes to remove any excess water. Turn off heat and allow to cool. From here you’re ready to put it in jars or throw it in freezer bags to save for a rainy day.
Past Plumbing Newsletters